Welcome to my blog where I will try to guide you about how to install and use FileZilla in Ubuntu.
This is a neccessary step for setting up WordPress manually.
I prefer FileZilla for uploading my website files from the extracted WordPress folder and I am installing it using command line. It is the quickest way to install FileZilla.
1- Open the Terminal: You can open the Terminal in Ubuntu by pressing Ctrl+Alt+T simultaneously or by searching for “Terminal” in the application launcher.
2- Update the Package List: Before installing FileZilla, it’s a good idea to update the package list to ensure you get the latest version available. Enter the following command in the Terminal:
$ sudo apt update
3- Install FileZilla: Use the following command to install FileZilla:
$ sudo apt install filezilla
When prompted to confirm the installation of FileZilla, press Y to continue with the installation.
4- Confirm the Installation: Confirm the installation by checking the currently installed FileZilla version and after that add the XtraDeb third-party PPA to get the latest FileZilla version. Once the PPA is added, update the packages and install FileZilla using the apt command.
$ filezilla --version
$ sudo add-apt-repository ppa:xtradeb/apps
$ sudo apt install filezilla
Now the installation is complete.
5- Launch FileZilla: Once the installation is complete, you can launch FileZilla from the application launcher. Search for “FileZilla” and click on the icon to start the application.
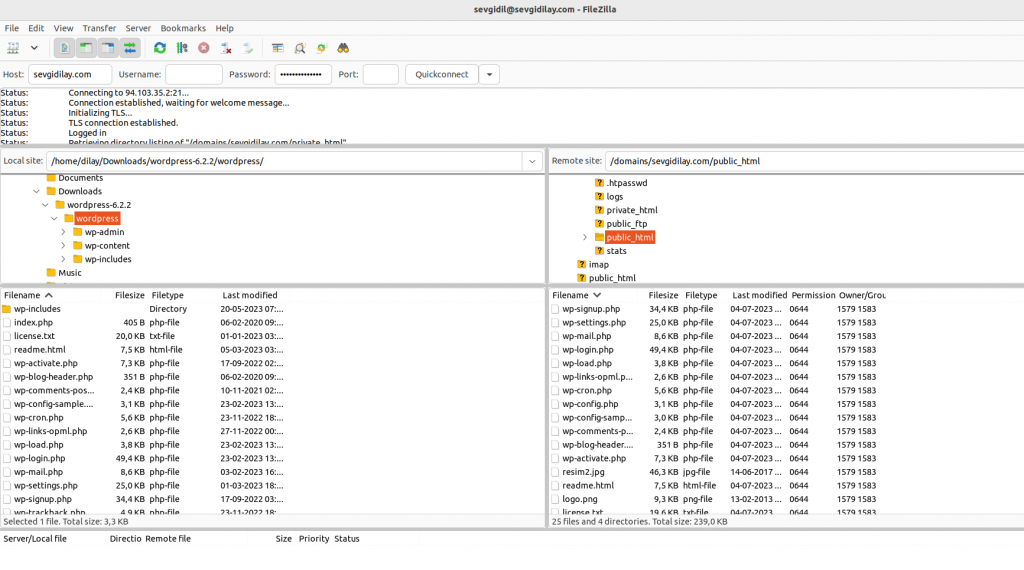
First of all, fill out the Host, Username and Password areas correctly. You don’t need to write anything for the port.

6- Transfer Files: Send out everything in the wordpress file(which is located inside my downloads) to the public_html.
**Don’t forget to delete index.html file inside the public_html before transfering! **
Now, we are done with the installation.
I hope this article was helpful for you, you can always reach out using contact button for your further questions.
Hi, this is a comment.
To get started with moderating, editing, and deleting comments, please visit the Comments screen in the dashboard.
Commenter avatars come from Gravatar.