WordPress is one of the best platforms that allow you to create your very own website freely.
There are some ways for setting up but in this blog, I’m gonna show how to set up manually so that you can gain some inside information.
I highly recommend you follow these steps by yourself!
1- Choose a Web Hosting Provider: Select a web hosting provider that meets the WordPress requirements (PHP version, database support, and HTTPS support) and offers manual installation options.
P.S.: I used Sunucupark as my Hosting provider and I recommend it.
Make sure you have the necessary credentials to access your hosting account.
2- Download the WordPress Files: Visit the official WordPress website https://wordpress.org/download/ and download the latest version of WordPress. It will be a compressed file (e.g., .zip format). Save it to your computer.
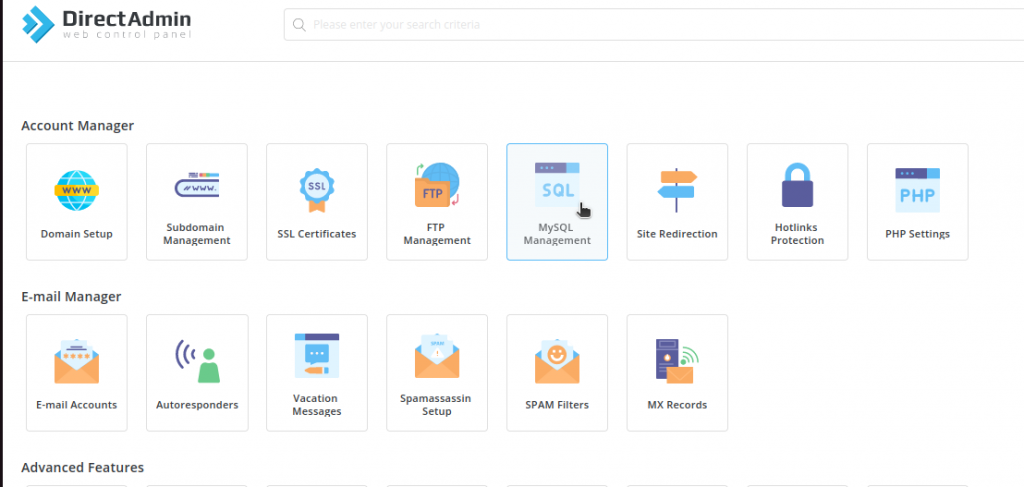
3- Create a Database: Log in to your hosting account’s control panel (I am using DirectAdmin but all of the control panels are working similarly) and find the “Databases” section.
It’s the MySQL Management section under the Account Manager.

Create a new MySQL database and note down the database name, username, password, and the database server address (usually “localhost”).
4-Upload WordPress Files: Access your hosting account using an FTP client (I used FileZilla) or the file manager provided by your hosting provider.
If you want to learn How to Install and Use FileZilla in Ubuntu you can click here for further information.
Locate the root directory of your domain (public_html or www), and upload the extracted WordPress files from your computer to that directory.
5- Configure the wp-config.php File: In the root directory of your domain, you’ll find a file named “wp-config-sample.php.” Make a copy of this file and rename it to “wp-config.php.” You will fill out this file according to your own information. Open the file in a text editor and fill in the database details you noted down in step 3 (database name, username, password, and server address). Save the file.
Here are the steps visually:


I have already copied and renamed the file as you can see below.

Now you need to change these 3 lines of code (23,26 and 29th lines) according to your informations.

And save the final version to finish this step.
6- Install WordPress: Open a web browser and visit your domain (e.g., www.yourdomain.com). You should see the WordPress installation screen. Select your preferred language and other necessary parts and then log in.
Now you have a WordPress website that you can modify easily.
If you want to learn some tips about WordPress, you can click here.
I hope this article was helpful for you, you can always reach out using the contact button or comments for your further questions.
[…] How to setup WordPress on Your Domain […]